最近学習しているプログラミング言語、Rust に関するポストです。
オフィシャルのドキュメントで、Rust を用いて Web server を組んでみるパートがありますが、その辺りを解釈しながら進めるのと、どうせならいろいろ改造してみようと、いうことでブログポストを書いていきます。
参考としている Rust のオフィシャルドキュメントはこちら、https://doc.rust-lang.org/book/ch20-01-single-threaded.html
マルチスレッド版もありますが、今回は自分が Webサーバの基本的な仕組みをおさらいする目的で、シンプルなシングルスレッドのバージョンにしておきます。
Prerequisite Knowledge: 前提知識
Web Server で必要となるプロトコルは、特に以下の2つ。
プロトコルとは、よく日本語で通信規約と訳される。また、プロトコルという単語自体は、より広義の意味を持つが、情報通信の文脈では、Communication Protocol:通信プロトコル、の意味で用いられる。
上記、HTTP, TCP はともに、request-response protocol と呼ばれる分類に属する。
i.e., クライアントの問い合わせに応じて、サーバーが応答するタイプのプロトコルということ。
TCP はより低レイヤ(コンピュータ寄り)の通信規約で、HTTP は高レイヤな規約。
*HTTP はどちらかというと人間寄りというよりも、ブラウザ寄りといった方が近いかも
少し乱暴な説明をすると、
- HTTP: Webブラウザで「何を」表示するかを規定する。(人間目線で見るとただのテキストデータ)
- TCP:ネットワーク上で「どのように」情報を伝達するか規定する。(人間目線だと0/1の集まり)
IPA の情報技術者試験等で、OSI 参照モデルとして7つのレイヤを学習しますね。
プログラム
まずは、cargo を使って、新規プロジェクトを作成します。
$ cargo new --bin web_server # <- 好きなプロジェクト名で

$ cd web_server # <- プロジェクトのディレクトリに移動
src/main.rs に main 関数を記述していきます。
標準ライブラリの内、ネットワーク関連の net モジュールを使用します。
Filename: src/main.rs
// struct TcpListner をローカルスコープにバインド
use std::net::TcpListener;

fn main() {
    // struct TcpListener を IPアドレス 127.0.0.1, ポート 7878 にバインドさせ、
    // インスタンス化、変数 listener にバインド
    let listener = TcpListener::bind("127.0.0.1:7878").unwrap();

    // 延々と接続を受け付けるイテレータ Incoming に対して、for文でループ
    for stream in listener.incoming() {
        // ローカル-リモート間の TCP ストリームを 変数 stream にバインド
        let stream = stream.unwrap();

        // "TCPでの接続OK!" を標準出力に表示
        println!("TCPでの接続OK!");
    }
}
上のコードに簡単な説明は追記しましたが、もう少しいろいろ肉付けしていきます。
ポイントとなる型:
- std::net::TcpListener: A TCP socket server, listening for connections.
- std::net::Incoming: An iterator that infinitely accepts connections on a TcpListener.
- std::net::TcpStream: A TCP stream between a local and a remote socket.
use キーワードは、Python とか JavaScript でいうとこの import です。オフィシャルの Keyword use ドキュメントより -> “Import or rename items from other crates or modules.”
IPアドレスについては、このご時世、特に説明はいらないでしょう。
* IP address wiki
ここで、特に “127.0.0.1” は、ローカルホスト (今使っている端末) の IP アドレスを示します。ループバックアドレスとも呼ばれます。
ポート番号は、アプリケーションごとに割り当てる番号のようなものです。こちらも乱暴にいうと、
IP アドレスでネットワークの中のどこにデータを送るかを判断 -> その送り先の中ではポート番号を用いてどのアプリケーションにデータを送るか判断、しているようなイメージ。
* Port wiki
ちなみに、Rust のオフィシャルドキュメント中、”7878 is rust typed on a telephone.” のような記載がありますが、これは、電話の古いテキスト入力方式です。スマホのキーパッドで “RUST” と入力しようと思うと、7(フリック) -> 8(フリック) -> 7(フリック) -> 8(フリック) となるはずです。要するに、これです。許される範囲の数字であればどのような数字にしてもいいですが、特に 0 – 1023 までの管理者権限が必要なポート番号と well-known port と呼ばれるポートは避けた方が良いでしょう。
また、10行目で変数 stream の型は、Result<TcpStream, Error> となり、12行目で unwrap() し、TcpStream 型で上書きされています。
ここで、ストリームについて、オフィシャルドキュメントではこのように説明がなされています。
A single stream represents an open connection between the client and the server. A connection is the name for the full request and response process in which a client connects to the server, the server generates a response, and the server closes the connection.
つまり、ストリーム=コネクション(接続) として考えて良しです。
もうちょっと厳密には、以下の通りとなっていますが、とりあえず今の所は気にしなくていいでしょう。
For now, our handling of the stream consists of calling unwrap to terminate our program if the stream has any errors; if there aren’t any errors, the program prints a message. We’ll add more functionality for the success case in the next listing. The reason we might receive errors from the incoming method when a client connects to the server is that we’re not actually iterating over connections. Instead, we’re iterating over connection attempts. The connection might not be successful for a number of reasons, many of them operating system specific. For example, many operating systems have a limit to the number of simultaneous open connections they can support; new connection attempts beyond that number will produce an error until some of the open connections are closed.
とりあえず実行させます。
$ cargo run
     ...
     Running `target/debug/web_server`
TCPでの接続OK!
TCPでの接続OK!
TCPでの接続OK!
ブラウザで、URLを「127.0.0.1:7878」と指定してサーバへの接続を試みてみます。
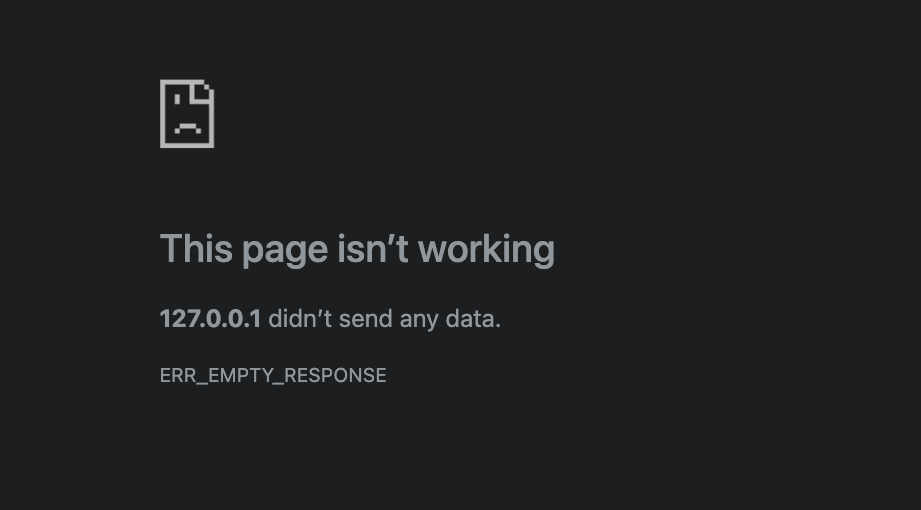
これで、リクエストがブラウザから発出されますが、もちろん、レスポンスの処理をサーバ側で何も規定していないので、ブラウザ上ではエラーになります。
Chrome だとこんな感じでした。
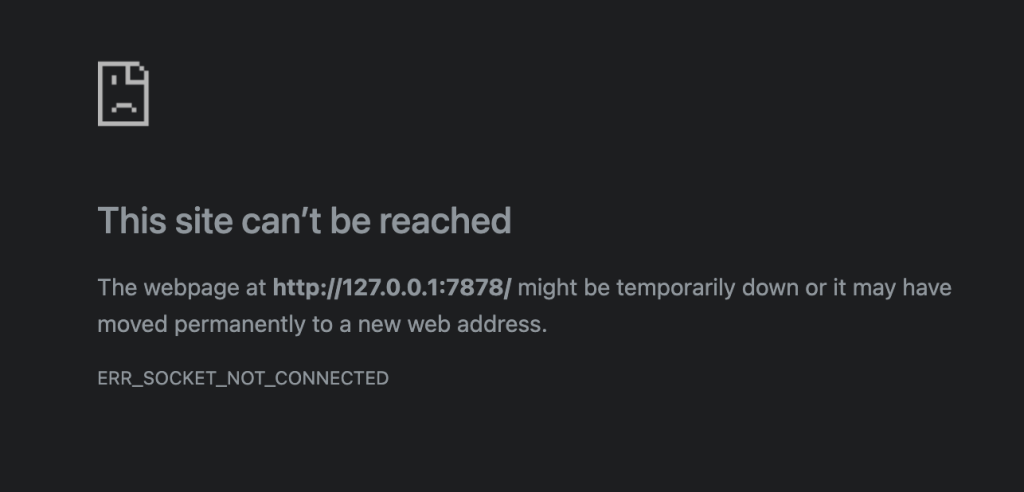
サーバプログラム側では、同じメッセージが何度も標準出力に表示されていますが、これはブラウザの仕様によるものです。サーバから何もレスポンスがないので再トライしたり、その他のリソースを探したり、のようにブラウザが動いています。
for ループで使用されているイテレータ Incoming は、そのままだと無限にストリーミングを返すため、ctrl+c あたりで実行を終了させてあげます。
それでは、受け取ったリクエストを読み取るコードを追記していきます。
Filename: src/main.rs
use std::{
    io::{prelude::*, BufReader},
    net::{TcpListener, TcpStream},
};

// main()関数のフローはほぼ同じ。
// メッセージの出力の代わりに、handle_connection() で処理をする
fn main() {
    let listener = TcpListener::bind("127.0.0.1:7878").unwrap();

    for stream in listener.incoming() {
        let stream = stream.unwrap();

        handle_connection(stream);
    }
}

// 可変なTcpStream型の変数 stream を受ける
fn handle_connection(mut stream: TcpStream) {
    // 新しく struct BufReader インスタンスを生成
    let buf_reader = BufReader::new(&mut stream);

    let http_request: Vec<_> = buf_reader
        .lines()  // lines()メソッドを呼び出し Linesイテレータ生成
        .map(|result| result.unwrap()) // 各要素を unwrap() する Mapイテレータ生成
        .take_while(|line| !line.is_empty()) // 「空ではない」要素を得る TakeWhileイテレータ生成
        .collect(); // イテレータから(String型の)コレクションに

    // リクエストの内容を表示
    println!("Request: {http_request:#?}");
}
ポイントとなる型:
- std::io::BufReader: The BufReader struct adds buffering to any reader.
- std::io::Lines: An iterator over the lines of an instance of BufRead.
- std::iter::Map: An iterator that maps the values of iter with f.
- std::iter::TakeWhile: An iterator that only accepts elements while predicate returns true.
ポイントとなるトレイト:
- std::io::BufRead: A BufRead is a type of Reader which has an internal buffer, allowing it to perform extra ways of reading.
やっていること自体は難しくないですが、Rust のイテレータの取り回し上、標準ライブラリを読みながら解釈すると少し複雑に見えます。
以下が割と重要です。
The browser signals the end of an HTTP request by sending two newline characters in a row, so to get one request from the stream, we take lines until we get a line that is the empty string.
HTTP の規約上、改行が2回、つまり、空行が1行あればリクエストの終点とプログラム上でみなす必要があります。したがって、.take_while(|line| !line.is_empty()) を呼び出しています。
実行してみます。
$ cargo run
   Compiling web_server v0.1.0 (/Users/kazuki/Desktop/web_server)
    Finished `dev` profile [unoptimized + debuginfo] target(s) in 0.22s
     Running `target/debug/web_server`
Request: [
    "GET / HTTP/1.1",
    "Host: 127.0.0.1:7878",
    "Connection: keep-alive",
    "Pragma: no-cache",
    "Cache-Control: no-cache",
    "sec-ch-ua: \"Google Chrome\";v=\"131\", \"Chromium\";v=\"131\", \"Not_A Brand\";v=\"24\"",
    "sec-ch-ua-mobile: ?0",
    "sec-ch-ua-platform: \"macOS\"",
    "Upgrade-Insecure-Requests: 1",
    "User-Agent: Mozilla/5.0 (Macintosh; Intel Mac OS X 10_15_7) AppleWebKit/537.36 (KHTML, like Gecko) Chrome/131.0.0.0 Safari/537.36",
    "Accept: text/html,application/xhtml+xml,application/xml;q=0.9,image/avif,image/webp,image/apng,*/*;q=0.8,application/signed-exchange;v=b3;q=0.7",
    "Sec-Fetch-Site: none",
    "Sec-Fetch-Mode: navigate",
    "Sec-Fetch-User: ?1",
    "Sec-Fetch-Dest: document",
    "Accept-Encoding: gzip, deflate, br, zstd",
    "Accept-Language: ja-JP,ja;q=0.9,en-US;q=0.8,en;q=0.7",
]
ブラウザ側はChrome だと、以下のように表示されます。
Chrome では、サーバ側がリクエストを受け付けるようにすると1回しかリクエストを試みませんでした、内部でいろいろ判断してくれてるんでしょう。(たぶん)
HTTP リクエストは、以下の要素から構成されています。
<Method> <Request-URI> <HTTP-Version> <CRLF>
<headers> <CRLF>
<CRLF>
<message-body>
具体的に、
- Method -> “GET”
- Request-URI -> “/”
- HTTP-Version -> “HTTP/1.1”
厳密には、URL と URI には意味合いの違いがあるが、今回の文脈ではそこまで気にしなくても問題ない。
The next part of the request line is /, which indicates the Uniform Resource Identifier (URI) the client is requesting: a URI is almost, but not quite, the same as a Uniform Resource Locator (URL). The difference between URIs and URLs isn’t important for our purposes in this chapter, but the HTTP spec uses the term URI, so we can just mentally substitute URL for URI here.
また、CRLF は、CR と LF のことです。(要するに改行)
The last part is the HTTP version the client uses, and then the request line ends in a CRLF sequence. (CRLF stands for carriage return and line feed, which are terms from the typewriter days!) The CRLF sequence can also be written as \r\n, where \r is a carriage return and \n is a line feed.
詳細な解説や仕様は、MDNのドキュメントや RFC 2616 があります。
MDN: https://developer.mozilla.org/en-US/docs/Web/HTTP/Messages
RFC 2616: https://datatracker.ietf.org/doc/html/rfc2616
続いて、HTTP レスポンスのフォーマットです。
<HTTP-Version> <Status-Code> <Reason-Phrase> <CRLF>
<headers> <CRLF>
<CRLF>
<message-body>
そして、リクエストヘッダやボディを取り除いた場合、以下のようになります。
(ステータスラインの1行のみ)
HTTP/1.1 200 OK\r\n\r\n上記を、レスポンスとしてサーバプログラムから返答させるには、Rust コード上でこれを文字列として生成し、TcpStream に書き込んでしまえばよいので、コードとしては、以下のようになる。
Filename: src/main.rs
use std::{
    io::prelude::*,
    net::{TcpListener, TcpStream},
};

fn main() {
    let listener = TcpListener::bind("127.0.0.1:7878").unwrap();

    for stream in listener.incoming() {
        let stream = stream.unwrap();

        handle_connection(stream);
    }
}

fn handle_connection(mut stream: TcpStream) {
    let response = "HTTP/1.1 200 OK\r\n\r\n";

    // write_all() メソッドで TcpStream インスタンスに書き込み
    stream.write_all(response.as_bytes()).unwrap();
}ここで、write_all() メソッドのは、引数として &[u8]型を受けるため、&str型の変数 response を as_bytes() メソッドで &[u8]型に変更する必要がある。
続いて、実際の Web サーバのように、ファイル(例えば “index.html”) の内容を読み取ってレスポンスを返すような機能を実装します。
これはよく、ウェブサーバのデーモンで設定するやつですね。(Nginx や Apache など)
その前に、読み取る用の index.html ファイルです。若干、Rust のオフィシャルドキュメントとは違う内容にしています。
Filename: web/index.html
<!DOCTYPE html>
<html lang="ja">
  <head>
    <meta charset="utf-8">
    <title>Hello</title>
  </head>
  <body>
    <h1>こんにちは</h1>
    <p>Hello world this is a web-server of rust</p>
  </body>
</html>
Rust のサーバプログラム側は、上記の index.html を読み取って、HTTPレスポンスを構築するように変更する。
※ 少しコードが長くなってきたので、以降は handle_connection() 関数の部分のみ記載します。
Filename: src/main.rs -> fn handle_connection()
fn handle_connection(mut stream: TcpStream) {

    // HTTPレスポンスの1行目 -> ステータスライン
    let status_line = "HTTP/1.1 200 OK";

    // HTTPレスポンスのヘッダ情報 -> レスポンスヘッダ
    let header = "Content-Type: text/html";

    // HTTPレスポンスの最終ブロック -> レスポンスボディ
    let contents = fs::read_to_string("web/index.html").unwrap();

    // 仕様に基づいて適切な HTTPレスポンスを構築
    let response =
        format!("{status_line}\r\n{header}\r\n\r\n{contents}");

    println!("Send a response!!!");

    // HTTPレスポンスをストリームに書き込み
    stream.write_all(response.as_bytes()).unwrap();
}
そこまで難しいことはしていません。
<レスポンス>=<ステータスライン> + <ヘッダ> + <ボディ>
として、HTTP の仕様上正しく “\r\n” を挿入しながらレスポンスを構築し、HTTPリクエストに対して投げ返させています。要するに、ブラウザに投げ返す。
なお、Rust オフィシャルドキュメントでは、レスポンスヘッダを “Content-Length: {length}” として、レスポンスボディの長さを明示的に利用していましたが、割と古い仕様?のようです。
最近のブラウザはその辺り、いい感じに取り回ししてくれるようで、”Content-Type: text/html” としてしまっています。(あまり細かいことは調べてないですが)
今度は、指定した URL が存在しないものである場合(Webサーバ側で設定されていない)によく見かける、「404 NOT FOUND」を表示させる機能とそのための条件分岐を追加します。
まずは、404.html ファイルから。
Filename: web/404.html
<!DOCTYPE html>
<html lang="ja">
  <head>
    <meta charset="utf-8">
    <title>Hello!</title>
    <style>
        h1 {
            color: red;
            font-size: 2em;
        }
    </style>
  </head>
  <body>
    <h1>Oops! 404 PAGE NOT FOUND</h1>
    <p>Sorry, I don't know what you're asking for.</p>
  </body>
</html>
ついでに、オフィシャルのドキュメントに倣って、冗長なコードをリファクタリングしておきます。
Filename: src/main.rs -> fn handle_connection()
fn handle_connection(mut stream: TcpStream) {

    let buf_reader = BufReader::new(&mut stream);
    let request_line = buf_reader.lines().next().unwrap().unwrap();


    let (status_line, filename, server_msg) = if request_line == "GET / HTTP/1.1" {
        ("HTTP/1.1 200 OK", "index.html", "Send a 200 OK response!!!")
    } else {
        ("HTTP/1.1 404 NOT FOUND", "404.html", "Send a 404 NOT FOUND response!!!")
    };

    let header = "Content-Type: text/html";
    let filepath = format!("web/{filename}");
    let contents = fs::read_to_string(filepath).unwrap();
    let response =
        format!("{status_line}\r\n{header}\r\n\r\n{contents}");

    println!("{server_msg}");
    stream.write_all(response.as_bytes()).unwrap();
}
概ね上で説明してきたので、特筆すべきことはないですが、buf_reader.lines().next().unwrap().unwrap() となっているのは、struct Lines の実装している Iterator トレイトの fn next() メソッドの戻り値の型が Option<Result<String>> となっているからです。
1つ目の unwrap() で、Option を、2つ目の unwrap() で Result を処理しています。
いろいろいじってみる
ということで、だいたい形になったので、ここから css だの JavaScript だの、Web に必須のリソースをレスポンスで返す機能まで追加していきます。
といっても、条件分岐でファイルタイプごとに MIME type を設定して、レスポンスを構築してあげるだけです。
さらに追加で、サーバサイドレンダリングをする Web アプリケーションフレームワークっぽい機能をつけておきます。こちらは、regex モジュールを使って、正規表現にマッチする文字列を置換して実装しています。
より具体的には、html ファイルの中に “{{ name }}” のようなトークンを埋め込んでおけば、Rust コード内の HashMap 内の key値にマッチした value値と置き換えてくれる、って流れです。
(もちろん単純な仕組みなので、同一 keyでの複数トークンの置換や、Django みたいな制御構文の導入とかまでは不可です)
Filename: src/main.rs
use std::{
    fs,
    io::{prelude::*, BufReader},
    net::{TcpListener, TcpStream},
    collections::HashMap,
};
use regex::Regex;

fn main() {
    let listener = TcpListener::bind("127.0.0.1:7878").unwrap();

    for stream in listener.incoming() {
        let stream = stream.unwrap();

        handle_connection(stream);
    }

}

fn handle_connection(mut stream: TcpStream) {

    let buf_reader = BufReader::new(&mut stream);
    let request_line = buf_reader.lines().next().unwrap().unwrap();

    dbg!(&request_line);

    let (status_line, filename, header, server_msg) = if request_line == "GET / HTTP/1.1" {
        (
            "HTTP/1.1 200 OK",
            "index.html",
            "Content-Type: text/html",
            "Send a 200 OK response!!!"
        )
    } else if request_line == "GET /css/404.css HTTP/1.1" {
        (
            "HTTP/1.1 200 OK",
            "css/404.css",
            "Content-Type: text/css",
            "Send a 404 CSS!!!"
        )
    } else if request_line == "GET /js/index.js HTTP/1.1" {
        (
            "HTTP/1.1 200 OK",
            "js/index.js",
            "Content-Type: text/javascript",
            "Send a javascript for index!!!"
        )
    } else {
        (
            "HTTP/1.1 404 NOT FOUND",
            "404.html",
            "Content-Type: text/html",
            "Send a 404 NOT FOUND response!!!"
        )
    };

    let filepath = format!("web/{filename}");
    // let contents = fs::read_to_string(filepath).unwrap();
    let contents = generate_user_view(
       fs::read_to_string(filepath).unwrap(),
    );
    let response =
        format!("{status_line}\r\n{header}\r\n\r\n{contents}");

    println!("{server_msg}");
    stream.write_all(response.as_bytes()).unwrap();
}

fn generate_user_view(html_string: String) -> String {
    let mut generated_view: String = String::from("");
    let mut context: HashMap<&str, &str> = HashMap::new();

    context.insert("name", "Kazuki Maehara");

    for (key, value) in context {
        let fmt_rgx: String = format!(r"(?<matched>\{{\{{\s*{}\s*\}}\}})", key);
        let rgx = Regex::new(&fmt_rgx).unwrap();
        generated_view = rgx.replace(&html_string, value).to_string();
    }

    generated_view

}
Filename: web/index.html
<!DOCTYPE html>
<html lang="ja">
  <head>
    <meta charset="utf-8">
    <title>Hello</title>
    <style>
      #rot {
        display: inline-block;
        font-size: 3em;
      }
    </style>
  </head>
  <body>
    <h1 id="header">こんにちは</h1>
    <div><span id="rot">くるくる</span></div>
    <p>Hello world this is a web-server of rust, by {{ name }}</p>
  </body>
  <script src="js/index.js"></script>
</html>
Filename: web/404.html
<!DOCTYPE html>
<html lang="ja">
  <head>
    <meta charset="utf-8">
    <title>Hello!</title>
    <link rel="stylesheet" href="css/404.css">
  </head>
  <body>
    <h1>Oops! 404 PAGE NOT FOUND</h1>
    <p>Sorry, I don't know what you're asking for.</p>
  </body>
</html>
Filename: web/css/404.css
h1 {
    color: red;
    font-size: 2em;
}
Filename: web/js/index.js
let rot = document.getElementById("rot");

const move_kf = [
    {
        transform: "translateX(0px) rotateZ(0)",
    },
    {
        transform: "translateX(500px) rotateZ(1.3turn)",
        color: "red",

    },
];

const kf_options = {
    duration: 3000,
    iterations: "Infinity",
    direction: "alternate",
};


rot.animate(
    move_kf,
    kf_options,
);
と、まぁこんなものです。
JavaScript で Keyframe 機能を使ってるので、実際にはアニメーションとして、動きのある画面になります。

まとめ
Rust についてはもちろん、基本的な Webサーバの作動について学ぶにはかなり良いドキュメントだと思います。
総じて、Rust のもつ、「システム言語なのに、高度な抽象化がなされている」という強みが存分に発揮されています。
これに、URLに基づくルーティング機能、マルチスレッド機能、エラーハンドリング、セキュリティ等々 どんどん高機能にしていったものが、いわゆる Nginx だったり、Apache だったりってことですね。
他にも、Rust で簡易なデータベースサーバとかも作れそうな気がしてきます。
それでは、この辺で。
See you soon!

コメント